Sourcery for the Sedentary
MLOps, musings, and more
Bashing Bash Into Shape
Bash isn’t a trendy shell like zsh or fish.
It doesn’t boast fancy colours and auto-complete suggestions out of the box.
Some of the syntax is admittedly a bit awkward.
For all that, it’s still my shell of choice.
This article explains how I configure bash as my daily driver to overcome some of its limitations.
If you use bash, you might find a few of these tips handy for improving your own experience.
If you already use another shell, you might not be persuaded to change back, but you might pick up a few ideas all the same.
Why bash?
Before explaining how I configure bash, it’s worth taking a moment to discuss why I still use it, even thought trendier alternatives exist.
The primary motivation is that bash is ubiquitous.
Practically every modern flavour of Linux provides bash out of the box, from container images like busybox to mainstream OS distros like Ubuntu and Red Hat.
Even on Windows, git-bash and WSL default to bash as their shell of choice.
By sticking with the default, it’s easy to switch between different environments that I haven’t configured, such as when interacting with coworkers or jumping into debugging issues.
Relatedly, it’s much easier to find help for commonplace tools than for more niche ones! Zsh is quite popular, so this isn’t a strong argument against it, but it’s always a reason to keep in mind when evaluating one’s stack.
The next reason to stick with the standard option is that it’s actually reasonably powerful.
Sure, it isn’t as glitzy as some of the alternatives, but I personally prefer a functional, productive environment that looks plain than one packed with visual bells and whistles that distract me from what I’m trying to do.
This is a highly subjective point, but personally I’m not a fan of tools that throw too much information at the user and try to draw their attention to things they don’t need to think about all the time.
For example, I don’t include the current git branch in my PS1 (de facto shell prompt) because I can query this when I’m interested in it.
Nor do I see the point in installing a plugin to tell me the time when it’s as easy to write into my bashrc once.
The point is, you can do a lot with bash, and for plenty of common tasks it’s no harder than anything else.
The final justification for sticking with bash is that it needs only a few tweaks to bring it up to par…
Assauging asymmetry
One of the most irritating things about a default bash setup, in my opinion, is that actions are asymmetric. Let me explain what I mean.
Bash provides a number of keyboard shortcuts out of the box. I’m not sure many people are even aware of this, based on the number of people I’ve seen navigating entirely by left/right arrows and the delete key, so it’s definitely worth mentioning! Bash has a rich set of movements/actions like:
- alt-b to move back a “word”,
- alt-f to move forward a “word”
- alt-d to delete forward a “word”
- control-w to delete back a “word”
- control-u to delete back to the beginning of the line
- control-k to delete forward to the end of the line
These are the ones I use the most – practically every day, in fact!
Note how I used quotation marks around “word”. That’s because I don’t agree with how bash interprets that term, or rather how it interprets it inconsistently. You see, moving back and forward and deleting forward obeys what I consider normal rules: punctuation and whitespace delimits a word. Deleting backwards, however, works on the basis of only whitespace, not punctuation.
A few years ago, I ended up so fed up of this I went down the rabbit hole to figure out what could be done to fix it. The solution, it turns out, is trivial: you just change the key bindings for whichever modes you care about. As an aside, you might not be aware that bash has two built-in modes – Emacs (the default) and Vim.
I now have the following in my bashrc:
stty werase undef
bind -m emacs '"\C-w": backward-kill-word'
bind -m emacs '"\e\C-w": unix-word-rubout'
This is frankly a bit arcane, so let’s see what this means.
The command stty deals with settings for the terminal, hence the name.
This first line removes the binding it has for werase, or “word erase”.
The second line states that control-w should use a deletion approach which respects punctuation, while the third line says that control-alt-w should use a deletion approach which respects only whitespace.
In this way, I retain the existing action (delete back to whitespace), but on a different binding; this is helpful when I have something like a URL that I want to delete.
The binding I use the most is the one which respects punctuation, and thus is symmetric with deleting forwards a “word”.
There are tens of other bindings if you run:
bind -ls
I haven’t played around with configuring many of the others, although partly that’s because I’m happy with many of them. You might find things that enormously improve your UX, so I’d encourage you to take a look!
Not letting go
The next trick isn’t unique to bash, but I do find it very useful when you don’t have (history-based) auto-complete suggestions. This is enabling eternal history.
By default, the history of which shell commands you’ve run is finite, and typically using what I’d consider to be a rather modest number. I prefer enabling eternal history: I want to know about what commands I’ve run in the past, even if I’ve not run them recently. In fact, it’s most often the ones I’ve not run recently that I need help remembering!
To enable this, I set:
shopt -s histappend
export HISTSIZE=
export HISTFILESIZE=
export HISTFILE=~/.bash_eternal_history
By effectively unsetting the history size, this removes the limit. Note that we do this for both the current shell session and the history file (shared between sessions).
You might also wish to use the following:
PROMPT_COMMAND="history -a; history -n; $PROMPT_COMMAND"
This appends history as it happens and makes sure the current shell is up to date with any history that other shells have written since the last command it executed. Depending on how to you like to manage your sessions, you might find one or both of these settings more aggravating than advantageous.
There are additional settings to allow for excluding certain commands from history or to prevent duplication of existing commands (although I’ve yet to configure this one correctly).
At worst, you can use other tools like an editor or sed or uniq to get rid of history you aren’t concerned about, but I’ve not encountered any issues with excessive history retention so far, either at work or at home.
When less is more
Once again, this isn’t specifically a tip for bash, but it’s something that makes my time using bash that much more enjoyable and productive. It’s also something I’ve never seen anyone else do, just like with fixing that stty/bind configuration!
You, dear reader, are most likely familiar with the pager utility less.
As you’re probably aware, less is the default pager for the outputs of many other commands, such as man pages.
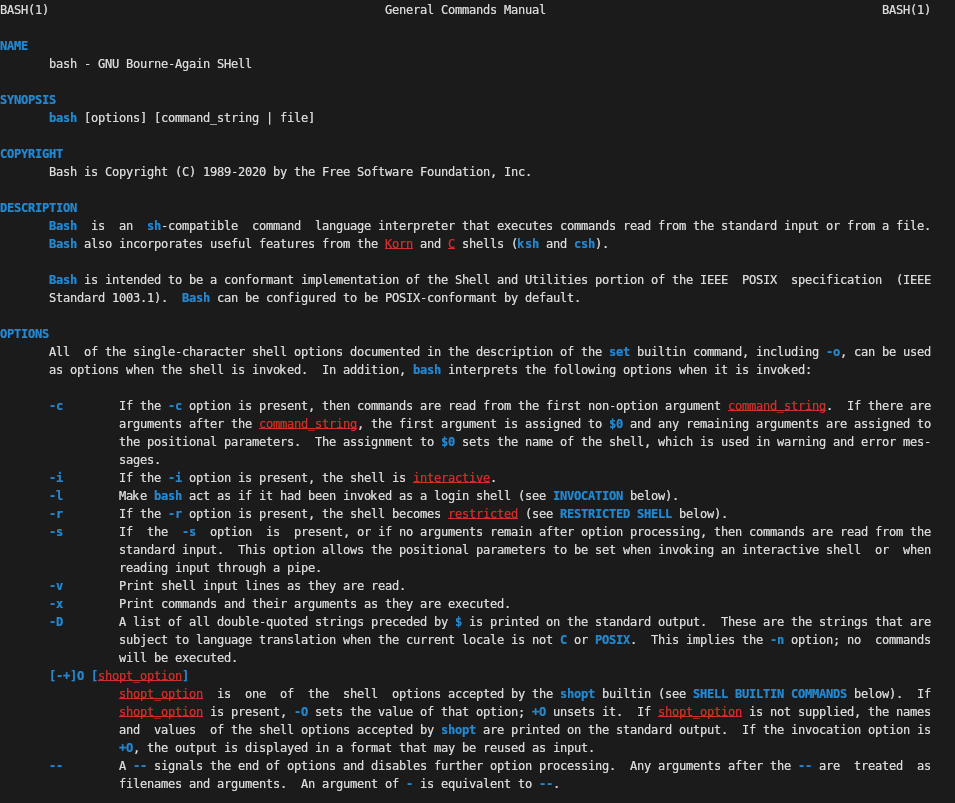
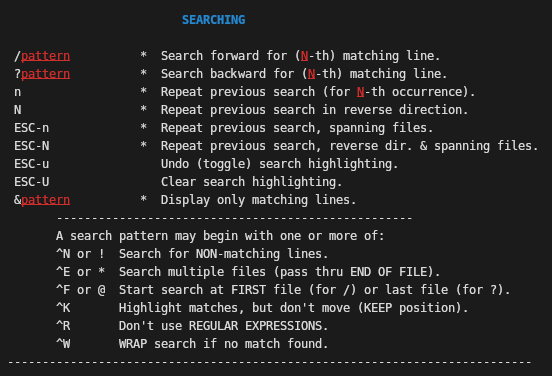
Now, less is an enormously powerful and underappreciated tool that deserves a blog post in its own right, but I’d like to mention one helpful feature of it: coloured content.
By default, less doesn’t apply any colour to what it’s paging through.
For something short, like the man-page of a simple command, that’s not a problem.
However, if you’re like me, then scanning over the output of man bash tends to leave me glazing over at what feels like miles of text.
It’s blank, it’s boring, it’s monotonous, it’s monochrome.
Humans like colour – it’s great for conveying information.
Allow me to introduce to you LESS, the shell variable for telling less how to behave.
Mine is set to the following:
export LESS='FRDd+b$Du+r'
If you thought those bind commands were obtuse, welcome to a-whole-nother level!
The key bits here are those +b and +r fragments, which tell less to use blue and red respectively for bold and underlined text.
All less is doing is reading the existing formatting style of the text and applying some colour-mapping to it, so there’s nothing special you need to do here.
It’s a simple thing, but I find it enormously easier to spot what I care about:
- Bold typically indicates options or configuration flags.
- Underlining typically indicates named entities in the body of text.
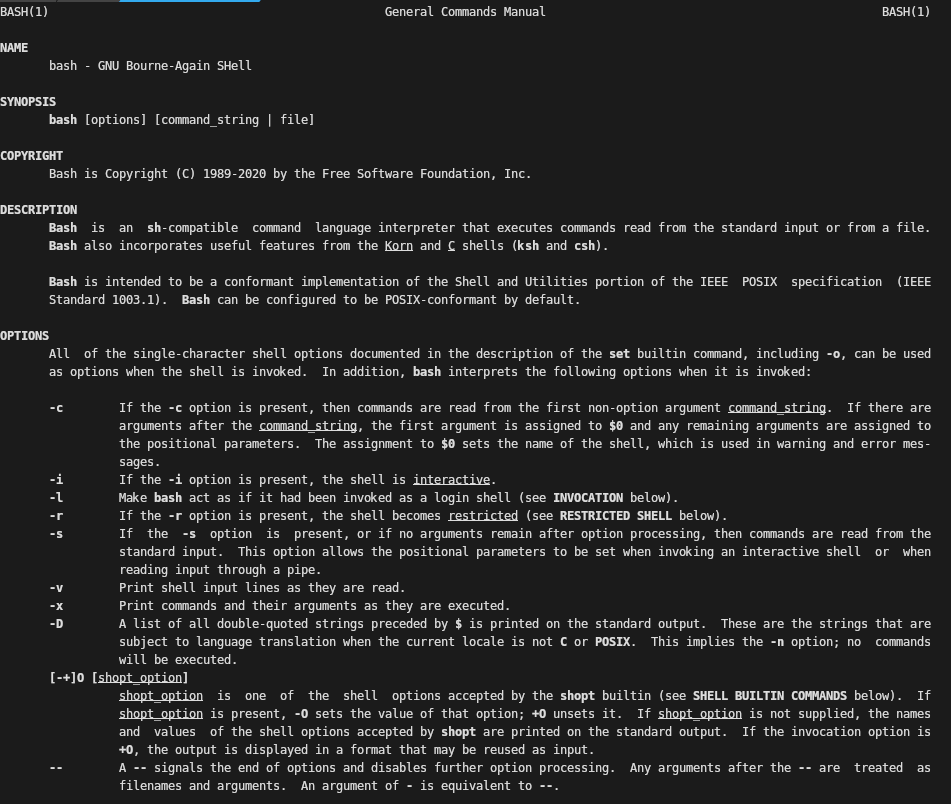
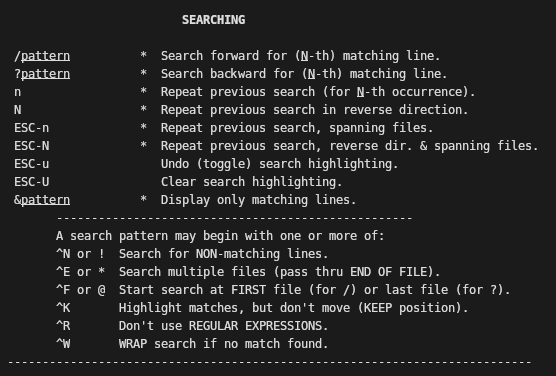
You can see the difference a dash of colour makes in the following screenshots.
The first two are from running man bash then part of the less help docs entered by then pressing h in any less window:
The next two are the same screens, but with the foregoing colour definitions applied. Notice how the coloured text draws the eye much more effectively than emboldened or underlined text, which for me at least tends to blend into a larger page.
Efficient edits
Earlier on, it was mentioned that there are plenty of shortcuts pre-assigned in bash, such as for moving forward and backward a word. Nifty navigation is a valuable and time-saving skill (I frequently jump to the start or end of a line, or forward or backward a couple of words), but it really helps to be able to edit a line, not just navigate around it.
Bash has plenty of commands for this very purpose! We’ve already seen a few, but let’s recap them for convenience:
- alt-d to delete the next word
- control-w to delete the last word
- control-u to delete to the start of the line
- control-k to delete to the end of the line
Undo! Undo!
There’s a built-in undo buffer, applied via alt-x followed by alt-u, i.e. while pressing alt, press x then press u. I like to remember this as eXecute Undo. This can be used multiple times to reverse multiple changes to the current command. Do note that undoing things is purely about editing the current line, not reversing the behaviour of anything that has already been executed.
Escaping Emacs-mode
For when navigating around word by word and making these small sorts of changes is just a bit too inconvenient, there’s an escape hatch in the form of alt-x followed by alt-e.
My mnemonic for this is eXecute Edit.
It’ll bring up your whatever variable you’ve set in your EDITOR environment variable, probably defaulting to vi or vim as a fallback.
This is particularly useful when you can’t remember the Emacs-mode bash hotkey you need or if you’re editing a larger block of text.
Making an argument
Sometimes you want to use an argument to a preceding command, quite probably even the last one. For example, perhaps you need to ensure a directory exists before running something else, as in:
mkdir -p foo/bar/baz
mv a/b/c foo/bar/baz
The shortcut alt-. (alt and the dot/period character together) provides access to the last argument to the last command. I use this frequently, and find it can be useful to think about the order in which arguments are supplied to programs so as to maximise the utility of this trick.
The old switcharoo
Sometimes I find I need to make an edit somewhere in the middle of a fairly long previous command. Normally, one would press the up arrow, navigate forward or backward however many words, then change perhaps a few characters (correcting a typo, changing the case of a letter, and so on). This is tedious and irritating, but there’s a better way!
Enter our friend the caret: ^. Carets allow for quick substitutions to the preceding command (or more properly the preceding shell history entry). They can be used with either two or three carets, like so:
ls /home/usernam # Note the missing 'e' in 'username'
^nam^name # ls /home/username
# Alternatively...
^nam^name^ # ls /home/username
Quick substitutions are one of a family of bash utilities called event designators. In fact, the caret syntax is just a shorthand for the full-form substitution command, which we’ll look at next.
Switcharoo 2: substitution boogaloo
The full-form substitution looks like this:
!!:s/foo/bar/<modifiers>
Where modifiers are one of the list specified here.
Mostly I use full-form substitutions when I need to apply the g (global) flag, but p (print instead of executing) can be very helpful for checking a substitution before applying it.
Do note that substitutions need not happen on only the last command, but can be applied further back in history too. I don’t personally make full use of this facility because of how I tend to access shell history, but it can be incredibly helpful on an unfamiliar machine or one on which it is not possible to install one’s usual setup.
Searching the archives
If you prefer a more interactive experience, there’s even a reverse history search shortcut built into bash. The three important keyboard shortcuts are:
- control-r, which instigates a new history search, going backwards
- control-s, which moves forward in history once in a search (i.e. the opposite of control-r)
- control-g, which exits the current history search without executing anything
You can press Enter or control-o to execute the current command from the history search.
The interface here is pretty basic, showing only a single line from history, but it’s perfectly functional.
The Library of Alexandria
The Library was a great repository of knowledge and history, which on a smaller, more localised level is what shell history provides.
As just discussed, shell history has some fairly powerful tooling around it, but even so it’s still a bit awkward to use.
That’s where fzf comes in.
This trick isn’t really anything to do with bash, but I’m sneaking it in here because it supercharges bash and negates some of the features built into other shells like zsh.
Junegunn Choi’s fzf is a fuzzy-finder with lots of integrations built around it.
For full disclosure, I use the Vim integration by the same author as well as the bash integration.
With the shell keybindings active, and they exist for more than just bash, the previously described reverse history search becomes enormously more useful.
For a start, you can see multiple lines from history (configurable as to how many, of course) and perform fuzzy rather than exact matches on them.
Using fzf has the further benefit that when you select an item from history, it is not automatically executed, but rather entered as the current line, allowing for further editing.
Between these three improvements over the default history search, the experience goes from usable but awkward to downright enjoyable.
Stop pressing the up arrow endlessly, start using fzf!
As I have a few different uses for fzf, I use colour-coding to differentiate between them.
While the default options for fzf look fine, I make a few other adjustments for personal taste.
My history search config is comprised of:
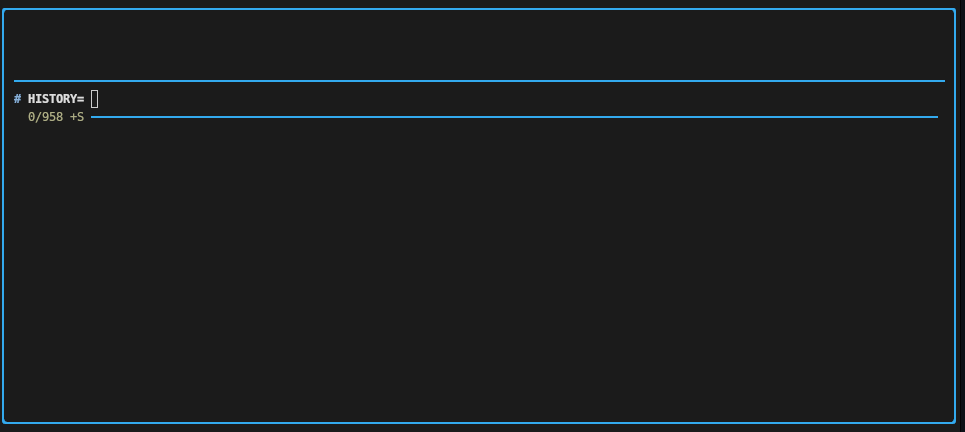
export FZF_DEFAULT_OPTS='--layout=reverse --border=rounded --height 40% --prompt="# " --pointer=">" --marker="*" --tabstop=4 --cycle --keep-right'
export FZF_CTRL_R_OPTS='--preview 'echo {} | sed -e "s/^ *\([0-9]*\) *//"' --preview-window top:3:wrap:border-bottom --color border:#33aaee'
This has a preview section of three lines and a history section below, together consuming 40% of the available screen, as shown below:
KISS – keep it short, stupid
Long, monolithic files or scripts tend to be unwieldy, with fragments of related things scattered throughout. This makes them hard to maintain, especially when you set some new config only to realise it’s been overridden by something later in the file!
A while back I was bothered by my .bashrc getting cluttered and messy in just this way.
Taking inspiration from how config is arranged for various tools under /etc, I rearranged my config to be structured under a ~/.bashrc.d/ directory alongside ~/.bashrc.
The RC file remains in place because that’s where config loaders expect it to be, but it sources files under the config directory to provide additional functionalities.
Amongst other things, I have “modules” (for want of a better term) for my PS1 (prompt) config, FZF options and aliases, source/version control functions, and Docker.
Once again, this isn’t really a bash tip, but it’s something I’ve found helpful in organising my shell setup. It keeps things modular, cleanly delineated, and comfortably extensible. There’s an additional benefit, in that I can disable an entire set of functionality by simply commenting out or removing a single line in my actual bashrc. The ability to selectively enable or disable config is helpful for developing new modules, for debugging issues with them (for example when on a new machine or when underlying components change), and for sharing them.
Summary
This article offers a number of ways to modify your shell session for improved efficiency:
- Keyboard shortcuts/hotkeys
- Command history
- Colouring output with
less - Editing modes
- Structuring config
There are plenty of other things one can do.
I use fzf for more than just browsing my shell history – it’s a versatile tool that can act as an interactive menu for many tasks.
Shells typically have ways of creating functions and aliases to script repetitive tasks.
Not to mention, there are many, many executables one can download to fulfil various needs, whether as replacements for existing, venerable (GNU) alternatives or for entirely new functionality.
Some honourable mentions include rg instead of grep, fd instead of find, and jq for working with JSON.
There’s a veritable smorgasbord out there, so it’s best to do a bit of your own exploration. In the meantime, I hope this article provides some insight and inspiration for you.